Odoo is a comprehensive open-source ERP suite covering CRM, e-commerce, accounting, manufacturing, inventory, and more.
This guide shows you how to install Odoo with Docker on Ubuntu 24.04, running Odoo and PostgreSQL from a single configuration file, with Nginx as a reverse proxy and a free Let’s Encrypt SSL certificate.
Note: Docker works well for development and testing, but production Odoo deployments require ongoing maintenance, security updates, and performance tuning. If you’d prefer a managed solution, Cloudpepper’s Odoo hosting handles all of that automatically. Curious why Cloudpepper itself doesn’t use Docker for production? Sven explains the reasoning in Why We Don’t Use Docker for Odoo at Cloudpepper
Before you begin:
- Deploy an Ubuntu 24.04 server.
- Create a non-root user with
sudoprivileges. - Point your domain name (For instance,
example.com) to your server’s public IP address.
Install Odoo Dependencies
You will use Docker to run Odoo and its database in isolated containers. This method simplifies installation and management. First, update your system and install Docker.
- Connect to your server using SSH and update the system packages.
$ sudo apt update && sudo apt upgrade -y - Install the necessary packages that Docker requires.
$ sudo apt install -y ca-certificates curl gnupg- ca-certificates: Adds trusted certificate authorities to your system, allowing your server to securely communicate with Docker’s servers.
- curl: Downloads a command-line tool for transffering data from a server. You will use
curlto download Docker’s security key. - gnupg: Helps verify that the Docker packages you install are authentic.
- Download and add Docker’s official security key to your system.
$ curl -fsSL https://download.docker.com/linux/ubuntu/gpg | sudo gpg --dearmor -o /etc/apt/keyrings/docker.gpg - Add Docker’s official package repository to your system package sources.
$ echo "deb [arch=$(dpkg --print-architecture) signed-by=/etc/apt/keyrings/docker.gpg] https://download.docker.com/linux/ubuntu $(lsb_release -cs) stable" | sudo tee /etc/apt/sources.list.d/docker.list > /dev/null - Refresh your system’s package list to include the new Docker repository.
$ sudo apt update - Install Docker and its tools.
$ sudo apt install -y docker-ce docker-ce-cli containerd.io docker-compose-plugin- docker-ce: The core Docker engine that runs the containers.
- docker-ce-cli: The command-line tool you use to control Docker.
- containerd.io: A background service that manages the container lifecycle.
- docker-compose-plugin: A plugin that allows you to define and run multi-container applications with a simple configuration file.
- Verify the installations by checking the packages’ versions.
- Check the Docker version:
$ docker --version - Check the Docker Compose version:
$ docker compose version
- Check the Docker version:
- Add your username to the
dockergroup. This way, you can run Docker commands without requiring to typesudoevery time.$ sudo usermod -aG docker $USER - Activate the new group membership to your current user’s session.
$ newgrp docker
Install Odoo with Docker Compose
You will now create a Docker Compose file that defines a PostgreSQL database and the Odoo application. This file manages Docker and PostgreSQL configurations and connection.
- Create a new directory for your Odoo project and navigate into it.
$ mkdir odoo && cd odoo - Create and open a new file named
docker-compose.yml.$ nano docker-compose.yml - Copy and paste the following configuration into the file. This configuration sets up both the PostgreSQL database and the Odoo app. Replace
YOUR_ODOO_PASSWORDwith a strong password.services: postgres: image: postgres:18.1 restart: always environment: - POSTGRES_DB=postgres - POSTGRES_USER=odoo - POSTGRES_PASSWORD=YOUR_ODOO_PASSWORD - PGDATA=/var/lib/postgresql/data/pgdata volumes: - ./postgres-data:/var/lib/postgresql/data odoo: image: odoo:19.0 restart: always depends_on: - postgres ports: - "8069:8069" environment: - HOST=postgres - USER=odoo - PASSWORD=YOUR_ODOO_PASSWORD volumes: - ./odoo-data:/var/lib/odoo - ./odoo-config:/etc/odoo - ./odoo-addons:/mnt/extra-addonsA breakdown of the above configuration:
- postgres service: Sets up the PostgreSQL database that Odoo needs to store information.
image: postgres:16: Uses version 16 of the PostgreSQL image.environment: Sets up the database name, user, and password.volumes: Saves the database files to a localpostgres-datadirectory on your server, ensuring your data persists if the container restarts.
- odoo service: Sets up the main Odoo application.
image: odoo:17: Uses version 17 of the Odoo image.depends_on: Ensures the database container starts before the Odoo container.ports: Makes Odoo available by mapping port8069on your server to port8069inside the container.environment: Tells Odoo how to connect to the PostgreSQL database using the credentials you set above.volumes: Creates three local directories to save Odoo’s data, configuration, and any custom modules you might develop.
- postgres service: Sets up the PostgreSQL database that Odoo needs to store information.
- Save and close the
docker-compose.ymlfile by pressing CTRL+X, Y, then Enter. - Create the local directories for your Odoo data.
$ mkdir postgres-data odoo-data odoo-config odoo-addons - Ensure the Odoo data directory has the correct permissions.
$ sudo chown -R 101:101 ./odoo-data
Configure the Firewall and Start Odoo
Ubuntu includes a firewall tool called UFW. You need to open the port Odoo uses so you can access its web interface.
- Allow traffic on port
8069through the firewall.$ sudo ufw allow 8069 - Reload the firewall to apply the new rule.
$ sudo ufw reload - Start the Odoo and PostgreSQL containers in the background.
$ docker compose up -d - Check that both containers are running.
$ docker psYou should see two containers listed with status “Up”.
CONTAINER ID IMAGE COMMAND CREATED STATUS PORTS NAMES 7b104805b1df odoo:17 "/entrypoint.sh odoo" 35 seconds ago Up 34 seconds 0.0.0.0:8069->8069/tcp, [::]:8069->8069/tcp, 8071-8072/tcp odoo-odoo-1 0c770c9fd02f postgres:16 "docker-entrypoint.s…" 35 seconds ago Up 34 seconds 5432/tcp odoo-postgres-1 - Open your web browser and navigate to the following address. Replace
192.168.0.1with your server’s public IP.http://192.168.0.1:8069You will see the Odoo database creation page.
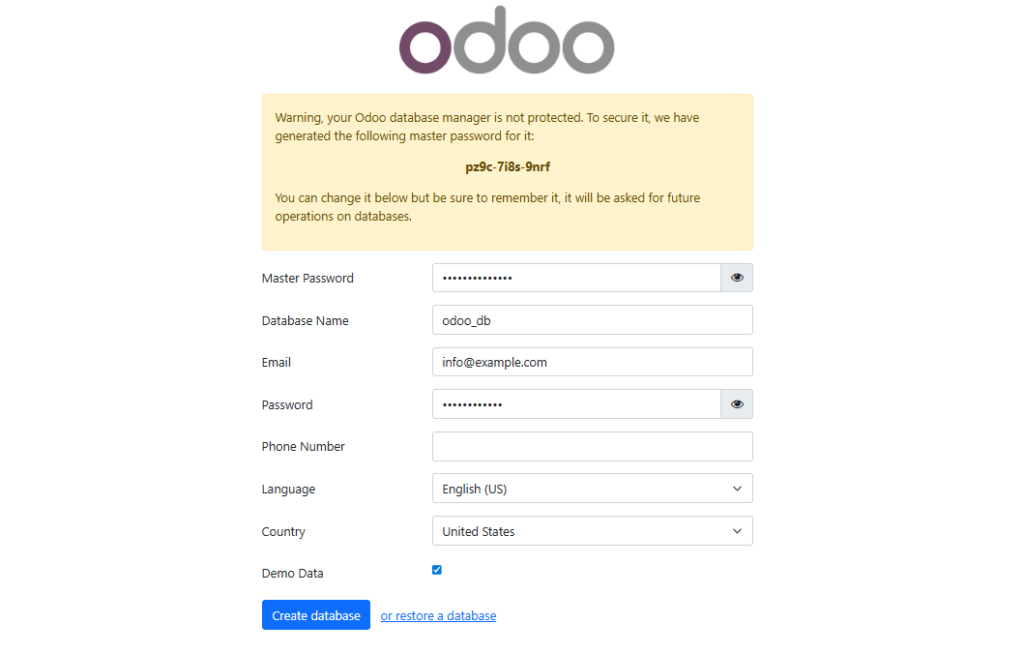
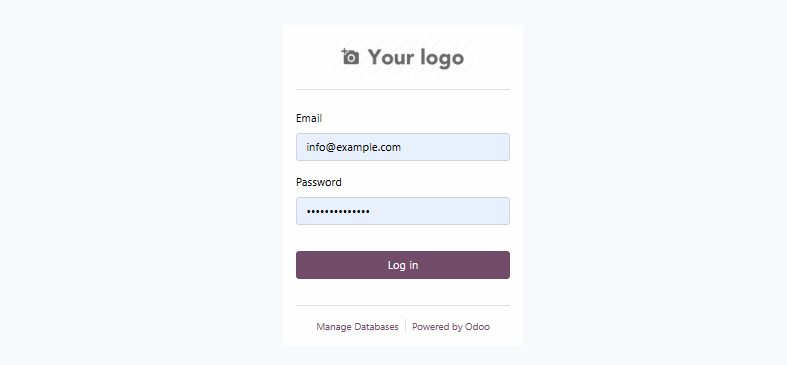
- Fill in the form to create your first Odoo database. Enter a name for your database, your email, and a master password. Click Create database.The installation will take a few moments. Once complete, you will be redirected to the Odoo login screen. Use the email and master password you just set to log in.
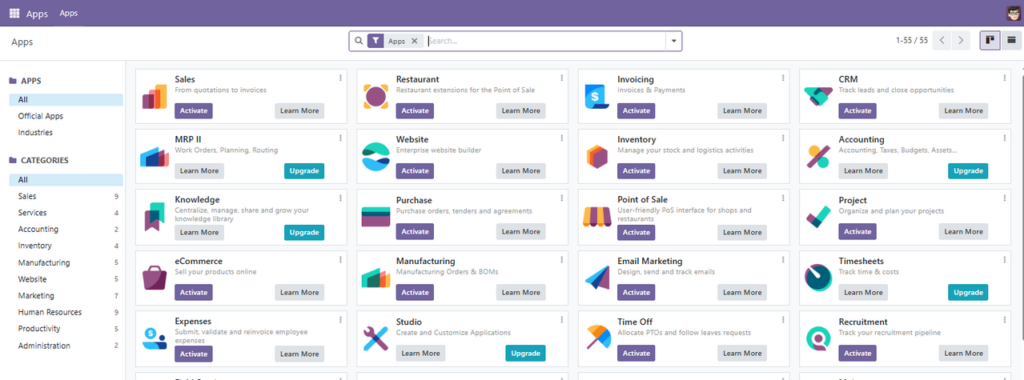
 After logging in, you should see a list of available Apps in the Odoo dashboard.
Secure Odoo with Nginx and Let’s Encrypt Certificate
Accessing Odoo directly via its port is functional, but not ideal for a production environment. You will now install Nginx as a reverse proxy to make Odoo accessible via your domain name and secure the connection with HTTPS.
- Install the Nginx web server.
$ sudo apt install nginx -y - Configure the firewall to allow web traffic (both HTTP and HTTPS).
$ sudo ufw allow 'Nginx Full' - Reload the firewall.
$ sudo ufw reload - Create a new Nginx configuration file for your Odoo site.
$ sudo nano /etc/nginx/sites-available/odoo - Paste the following configuration into the file. Replace
example.comwith your actual domain name.server { listen 80; server_name example.com; location / { proxy_pass http://localhost:8069; proxy_set_header Host $host; proxy_set_header X-Real-IP $remote_addr; proxy_set_header X-Forwarded-For $proxy_add_x_forwarded_for; proxy_set_header X-Forwarded-Proto $scheme; proxy_read_timeout 720s; proxy_connect_timeout 720s; proxy_send_timeout 720s; } } - Save and close the
/etc/nginx/sites-available/odoofile. - Enable your Odoo site configuration by creating a link to the
sites-enableddirectory.$ sudo ln -s /etc/nginx/sites-available/odoo /etc/nginx/sites-enabled/ - Test the Nginx configuration to ensure there are no syntax errors.
$ sudo nginx -tOutput:
nginx: the configuration file /etc/nginx/nginx.conf syntax is ok nginx: configuration file /etc/nginx/nginx.conf test is successful - Reload Nginx to load the new configuration.
$ sudo systemctl reload nginx - Install Certbot and the Nginx plugin.
$ sudo apt install certbot python3-certbot-nginx -y - Run Certbot to get and install an SSL certificate for your domain. Replace
example.comwith your domain name.$ sudo certbot --nginx -d example.com - Follow the prompts:
- Enter your email address for renewal notices.
- Agree to the terms of service.
- Choose whether to share your email with the Electronic Frontier Foundation.
- Select 2 to redirect all traffic when asked about redirecting HTTP traffic to HTTPS to make your application more secure.
If successful, Certbot confirms that you have now enabled HTTPS.
Deploying certificate Successfully deployed certificate for example.com to /etc/nginx/sites-enabled/odoo Congratulations! You have successfully enabled HTTPS on https://example.com - Visit your domain in a browser.
https://example.comYou should now automatically be redirected to the secure HTTPS version of your Odoo site.
- Log in to the Odoo dashboard using the credentials you set earlier.

Conclusion
You have successfully installed Odoo on Ubuntu 24.04 using Docker. Your installation includes a separate PostgreSQL database, with all data safely stored in persistent volumes. You configured Nginx as a reverse proxy to serve Odoo under your domain name and secured the connection with a free Let’s Encrypt SSL certificate.
Your Odoo Docker instance is now ready for production and you can enable the applications you need for your business needs. Keep in mind that production environments require regular security updates, backups, and performance monitoring. If you want these management tasks automated, Cloudpepper offers managed Odoo hosting that works with Docker or connects to any cloud provider while handling all DevOps complexity.