Step 1: Provision your first server for Odoo #
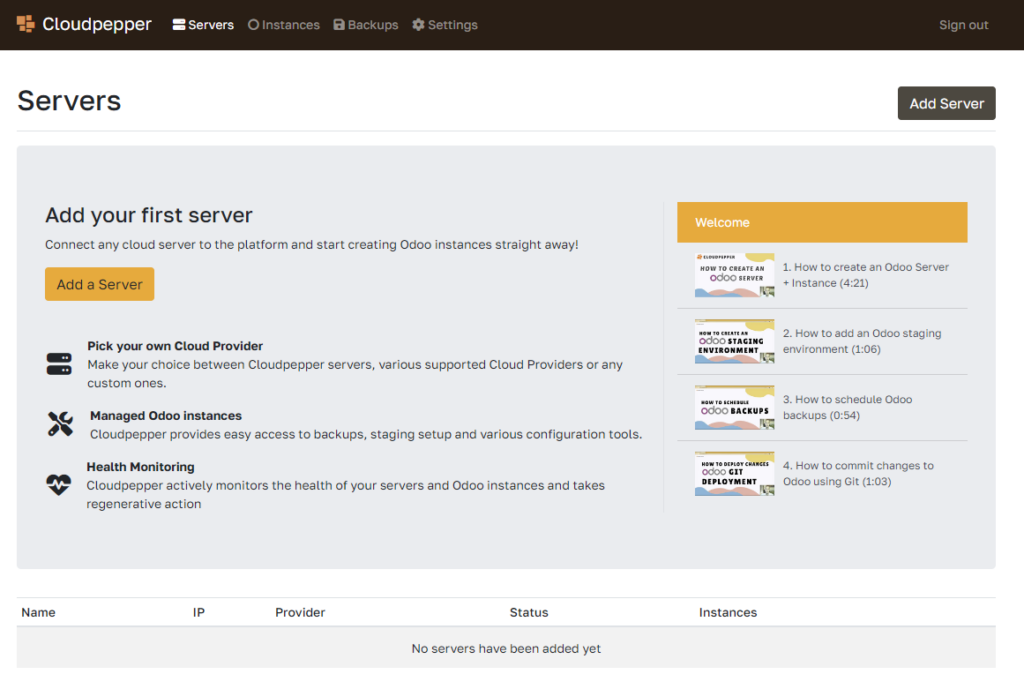
When you log in to your Cloudpepper dashboard, you will have the option to add your first server. Once you add a server, Cloudpepper will automatically provision it for Odoo cloud management. This takes around 5-15 minutes depending on the cloud provider.
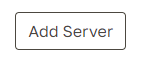
Click Add Server #
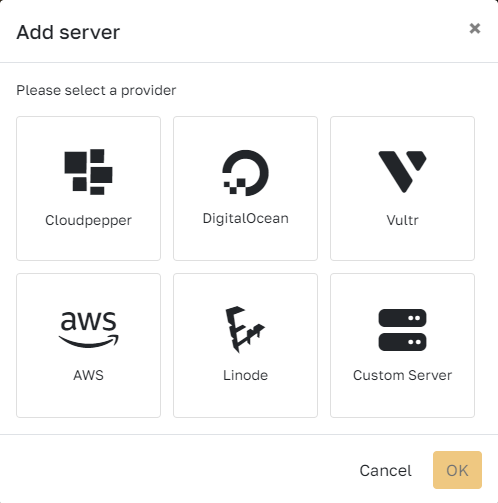
Select your preferred cloud provider or add a custom server
We offer a range of cloud providers you can straight away create a server on, or you can select a custom server if you already have an empty server you want to use for Odoo.
Which cloud provider should I choose?
Cloudpepper has several cloud providers to select from. For affordable yet stable servers, we recommend DigitalOcean, Linode or Vultr. We recommend choosing Vultr or AWS (Amazon) if you need a bigger selection of datacenters. If you need a greater range of servers, we recommend choosing Vultr, Linode or AWS (Amazon).
Looking for performance on a budget? Check out our Odoo performance comparison test on budget servers of DigitalOcean, Vultr, Linode and AWS.
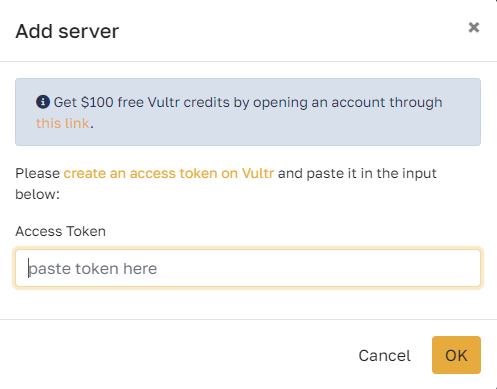
First retrieve an API Key from your cloud provider to enable connection
To ensure you can connect to a cloud provider, you’re required to fill in your API key one time only, which you can retrieve in the dashboard of your cloud provider. The wizard provides a direct link to where you can find your API key on your cloud provider’s backend.
When to choose a custom server?
Choose the Custom Server option when you already have a server with a cloud provider, if you can’t find your cloud provider in the list, or if you have a local server in your office.
Ensure the server is a clean installation of Debian 10 or Ubuntu 20.04 / 22.04. You only need to fill in your hostname, root user and password and Cloudpepper will take care of the rest.
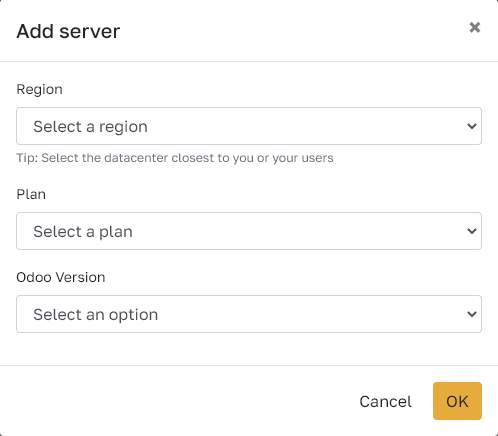
Select the details of the server #
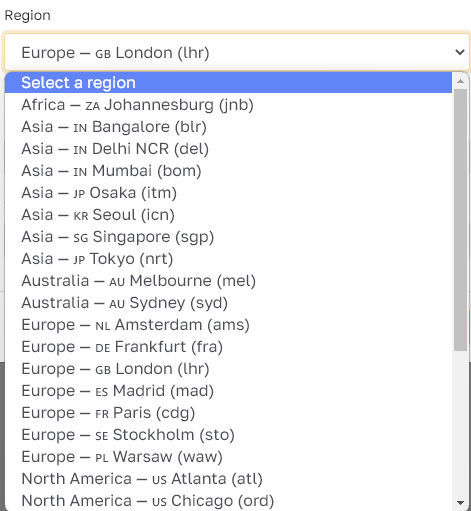
Which region do I select?
Choose the region closest to your system’s users to ensure low latency, which will give you faster loading speeds. If the users of your system are your customers (i.e. you use Odoo as your e-commerce or website), choose the region nearest to your customers.
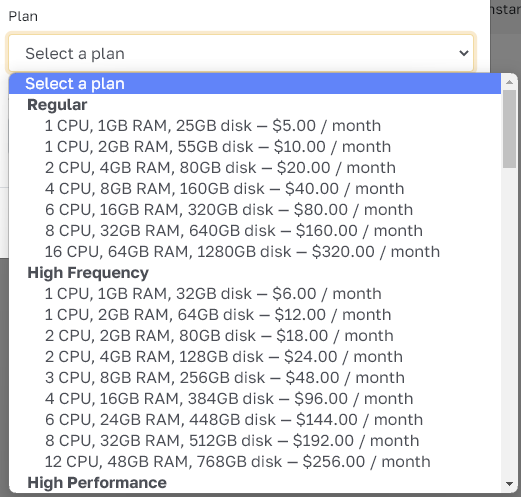
What server size do I need? (Server plan)
If you will only run one Odoo instance on your server, and your instance is relatively basic with less than 25 users, you can start with a regular 1vCPU, 1GB server. If your business grows, you can upgrade your server specifications or migrate your Odoo instance to another server with the click of a button in your Cloudpepper dashboard.
Feel free to contact our support for recommendations.
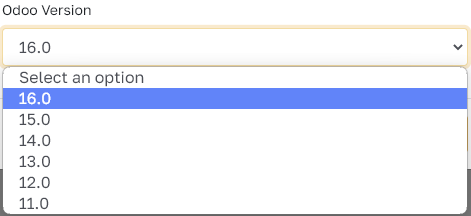
What Odoo version do I choose?
We support Odoo versions 11 up to the latest version. If you want to install new Odoo instances on the server, select the latest version (highest number). If you have an existing Odoo instance you want to move to another server with Cloudpepper, select the version of your Odoo instance.
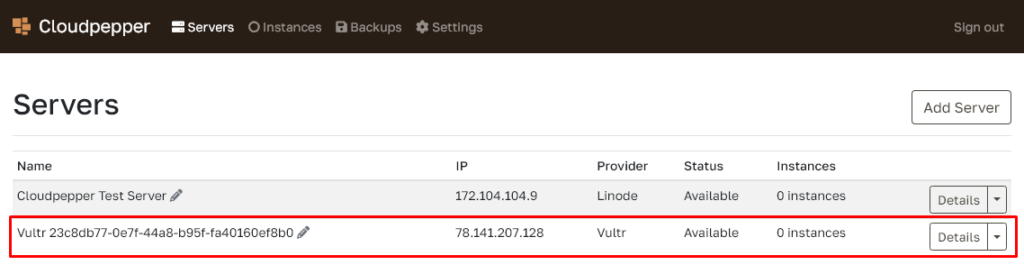
Click OK to create the server #
This process takes about 5 to 15 minutes, depending on the cloud provider and the performance of the server. Feel free to make yourself a coffee (or tea) while the server is being provisioned.

Once your server is ready, you can now use it to create Odoo instances.
Step 2: Create your Odoo instance #
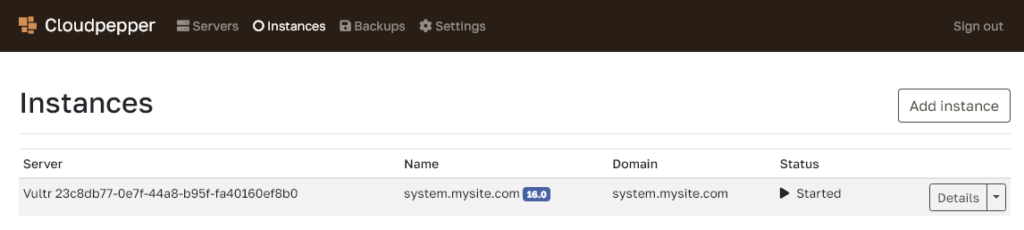
2.2 Go to Instances #
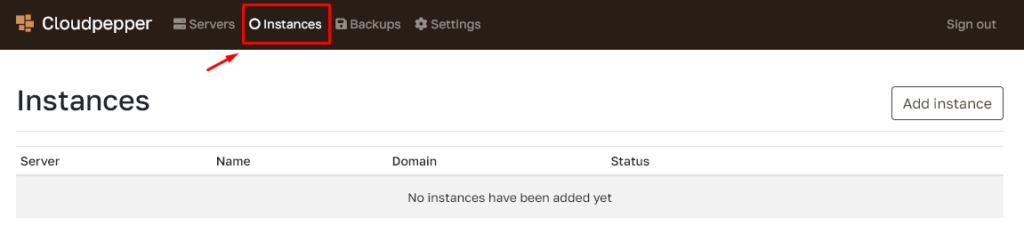
2.3 Click Add instance #

2.4 Select the server, Odoo version and domain name #
Select which server to create the Odoo instance on, the desired Odoo version and the domain name of the Odoo instance.
If you choose a domain name, ensure you have already created the related A record with the server’s IP address.
Having an A record before creating the instance will ensure you can immediately access your Odoo instance with the desired domain name using https://, as it will allow Cloudpepper to create your SSL certificate.
2.5 Click Add instance to create #

Click the Add instance button and Cloudpepper will start creating the Odoo instance on the selected server.

After just a few minutes, your Odoo instance is ready for access.