Introduction #
AWS is the world’s largest cloud provider, trusted by enterprises for its global reliability and flexibility. It lets you start small and grow as your business needs more power, while keeping your data safe on resilient storage that protects against hardware failures. You can even enable automatic recovery so your server is restarted on healthy hardware if the underlying host fails. With Cloudpepper you can launch Odoo on AWS in just a few clicks, without touching the complex setup behind the scenes.
Requirements #
- Base, Pro or Agency plan with Cloudpepper
- AWS Account (sign up here)
Step 1. Connect AWS to Cloudpepper #
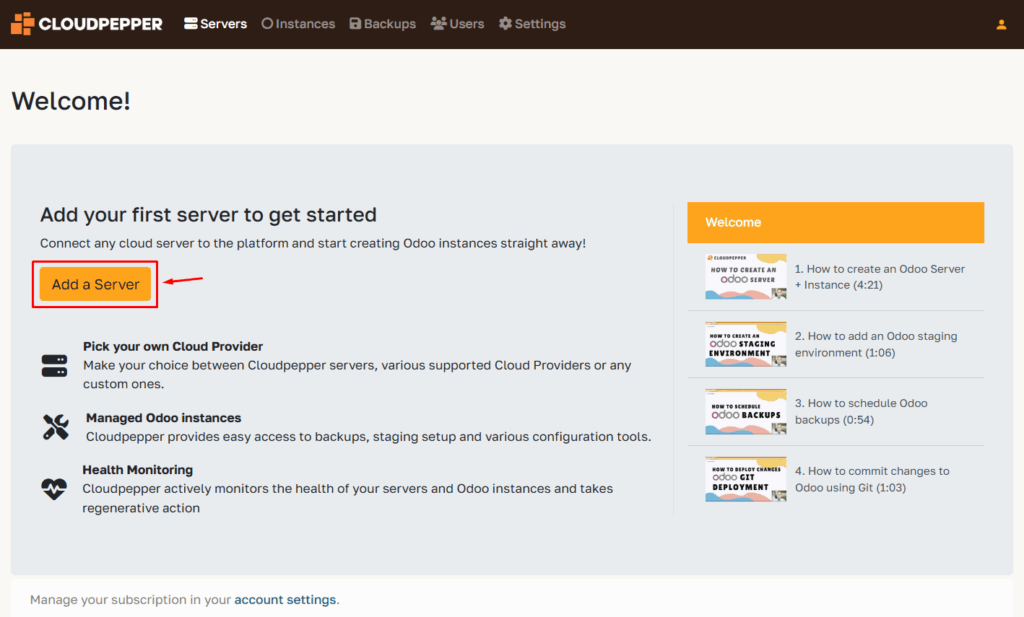
Before you can provision servers in your AWS account from the Cloudpepper dashboard, we need to connect your AWS account. In your Cloudpepper dashboard, click Add a Server.
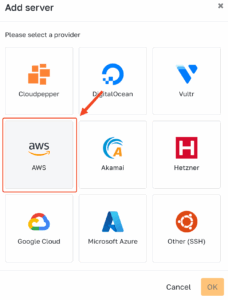
Select AWS as your cloud provider.
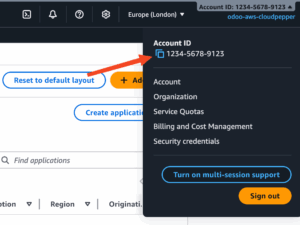
Select your Default Region for new servers and fill in your Account ID.

You can find your Account ID in the top-right corner after logging in to the AWS console.
Click Link your AWS account. This opens the AWS console and starts a CloudFormation stack to create a role for Cloudpepper with the minimal permissions needed to create and manage servers on your behalf. You can edit the role later if you need to restrict permissions further.
Scroll down the AWS page to acknowledge and Create stack.

You will be redirected to the events page. Once you see the status CREATE_COMPLETE, you can return to My Cloudpepper and click OK. Your account is now successfully linked.
Step 2. Select your server #
With your AWS account connected, you’ll see a screen to configure your new server. Here’s what each option means:
- Region: Choose the datacenter where your server will run. Pick the one closest to your users for best performance. (overview of available AWS regions)
- Instance type: The size of your server (overview of all sizes and prices per region). Not sure what to pick? Use our server sizing guide. A t2.small (1 vCPU, 2 GB RAM) is sufficient for a basic Odoo instance with 6-8 concurrent users. If you have 12 concurrent users, move to t3.small (2 vCPU, 2 GB RAM) or t3a.medium (2 vCPU, 4 GB RAM). You can always resize later as your needs grow.
- Storage size (GB): Decide how much disk space your server needs. This covers your Odoo database, modules and filestore. Backups are stored externally.
- Odoo version: Select which version of Odoo to deploy (e.g. 17, 18, or 19).

Once you’ve filled in the details, click OK to start provisioning your server. Cloudpepper will automatically install updates, apply security settings, tune performance, and set up all required software for Odoo. The process takes about 10–20 minutes. When it’s finished, you’ll be ready to create your first Odoo instance.
Optional. Enable automatic recovery #
Automatic recovery restarts your server on healthy hardware if the underlying host fails. It keeps the same instance ID, IP addresses, and EBS volumes. There is no extra cost.
How to enable it #
- Open the AWS Console and go to CloudWatch
- Alarms → Create alarm
- Select metric → EC2 → Per-instance metrics → StatusCheckFailed_System
- Choose your instance and continue
- Set the condition to Greater than 0 for at least 5 minutes
- Configure actions → EC2 action → Recover this instance
- (Optional) Add an email notification via an SNS topic
- Name the alarm and create it
Good to know #
- You keep paying the normal EC2 and EBS charges only
- Works within the same Availability Zone
- Requires EBS backed instances (most EC2 setups use EBS)
- Does not protect against application errors
Optional performance tip. Switch storage from gp3 (default) to io2 #
For most Odoo deployments, Cloudpepper’s default gp3 EBS volume is the best balance of price and performance. If your database is very busy (many concurrent users, heavy reporting, sustained high I/O) and/or you need consistently low latency with higher provisioned IOPS, you can consider moving the volume to io2.
What’s the difference (and what will it cost)? #
- gp3 (default): Includes 3,000 IOPS and 125 MiB/s throughput at no extra cost. You can dial up to 80,000 IOPS and 2,000 MiB/s, but each increase above baseline raises your AWS bill. Best price and performance for most Odoo deployments.
- io2: You provision the IOPS you need and pay per GB-month plus per provisioned IOPS. It offers steadier performance and lower latency under heavy write loads, up to 64,000 IOPS per volume. Typically higher cost.
Cost warning: Whether you tune gp3 beyond its baseline or switch to io2, extra performance means extra cost. However, you can always switch back to gp3.
How to switch gp3 → io2 (AWS Console) #
- Open EC2 Console → Elastic Block Store → Volumes.
- Select the volume attached to your Cloudpepper server (check the Attachment information column to confirm the instance).
- Actions → Modify volume.
- Change Volume type to io2.
- Click Modify → confirm. The state will go to modifying then optimizing. Your instance keeps running throughout on supported setups.
Tip: If you later find you over-provisioned, you can switch back to gp3 the same way.